
Using Logo & Text Embroidery
 Our website includes self-service features that allow you to easily add embroidered logos and text embroidery to most products. Below find step-by-step instructions on how to do this. You can find general information about Logo & Text Embroidery on our Embroidery Page. We have extensive production capabilities for embroidery so regardless of the size of your order we can process it quickly (normal processing times for embroidery orders is 5-10 business days). If you have any questions, please send us an email from our Contact Us page.
IMPORTANT NOTE
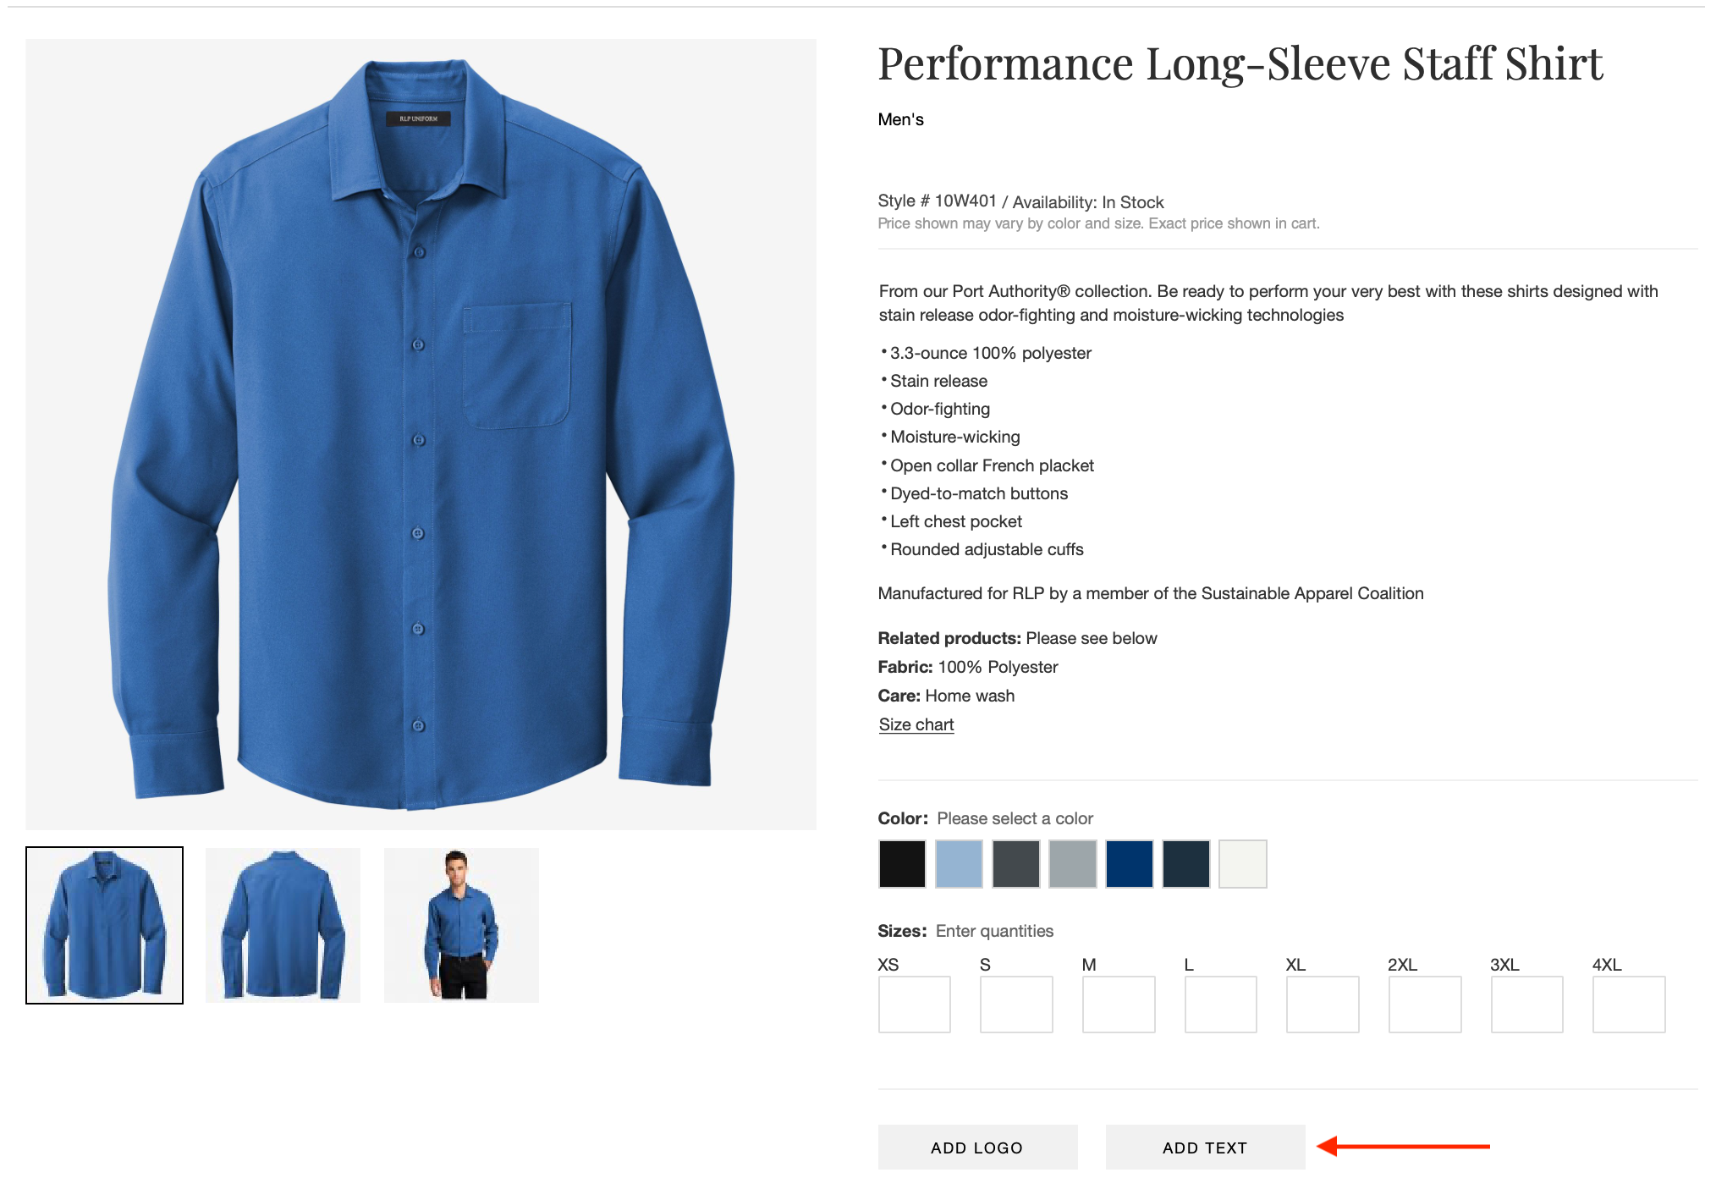
Throughout this tutorial you are going to see references to the ADD LOGO and ADD TEXT buttons. These buttons are located on the individual product pages just above the ADD TO CART button. If you DO NOT see one or both of those buttons on a product page you are interested in, that doesn't mean that we can't embroider that item - rather it means that item requires some special handling or has specific limitations regarding embroidery. If you are interested in embroidery on one of these products, please send us an email via the form on our Contact Us page with the product item number and the quantity you are interested in purchasing (there is a minimum requirement starting at 36 pieces for items that require special handling). We will contact you promptly to discuss your needs.
Please note that garments with embroidery or customizing options cannot be returned/exchanged unless defective. Proof your order carefully before submitting.
Adding a New Logo
Step 1: Upload a logo. There are two places you can do this.
From the Account Dashboard click LOGO LIBRARY, then click the ADD NEW LOGO button.
![]()
From any product page displaying the ADD LOGO button. Click the ADD LOGO on the product page / then ADD LOGO on the page that follows.
![]()
![]()
Step 2: Complete the information.
- Browse to find the logo picture on your computer or drag it to the box
- Enter the name you would like to call the logo
- We need to know the width you would like the logo to be (we can't process your logo without this dimension). If you have other shirts with a logo, you can measure that or cut a piece of paper and hold on a shirt to get an idea on what size you would like. The maximum width for most embroidery locations is 4" but that is a bit wide for most logos. Most logos we see are between 2.5" wide and 3.5" wide depending on the design. If the size you enter doesn't appear optimal to us, our art department will recommend a size you may want to consider.
- If you know the color(s) you want to use for your logo, please enter. We will need this information at some point so best to enter it here if you know it. Many customers already have specific PMS color they want to match - if so please enter those here. If you don't have PMS numbers, you can give us HEX values. You can alternatively choose colors from our thread chart.
![]()
That's it. After uploading your logo, we will prepare a quote which specifies the number of stitches in the design, dimensions, and the setup fee. We will send you an email with directions on how to view the quote. After you approve the quote, we then create your logo, you approve it, and your logo is ready to use. The general time frame for this process is 3-5 business days.
Adding A Logo to a Product
Step 1: Select the color for the product you want to purchase and enter quantities (alternatively you can perform this later if you prefer).
Step 2: Click the ADD LOGO button. Note: You can only add logos to 1 color product/color at a time so if buying more than 1 color of the product you will have to repeat ADD LOGO process for each color.
![]()
Step 3: Select the logo you want to add to the garments
![]()
Step 4: Select the location where you would like the logo and click ADD LOGO TO ITEMS. Please note that you cannot put more than 1 logo in a single location on the same item. If already using Text Embroidery on a location, you cannot then add a logo to that same location.
![]()
Step 5: If you would like to add a second or more logos to the same garment, just click ADD LOGO and repeat the process above. You can add as many logos as there are available locations on a garment (1 logo per location).
Step 6: If you already performed Step 1 you are ready to click ADD TO CART. If not, now is the time to select the product color and enter the quantities, then click ADD TO CART.
![]()
After you have added the items to the cart the embroidery system will reset so any new color or product you add to the cart after that point will not have the logo attached. If you would like to add the logo to a different color or product, you would just restart this process for that product.
Adding Text Embroidery to a Product
Step 1: Select the color for the product you want to purchase and enter quantities (alternatively you can perform this step later if you prefer).
Step 2: Click the ADD TEXT button. Note: You can only add text embroidery to 1 color product/color at a time so if buying more than 1 color of the product you will have to repeat the ADD TEXT process for each color.
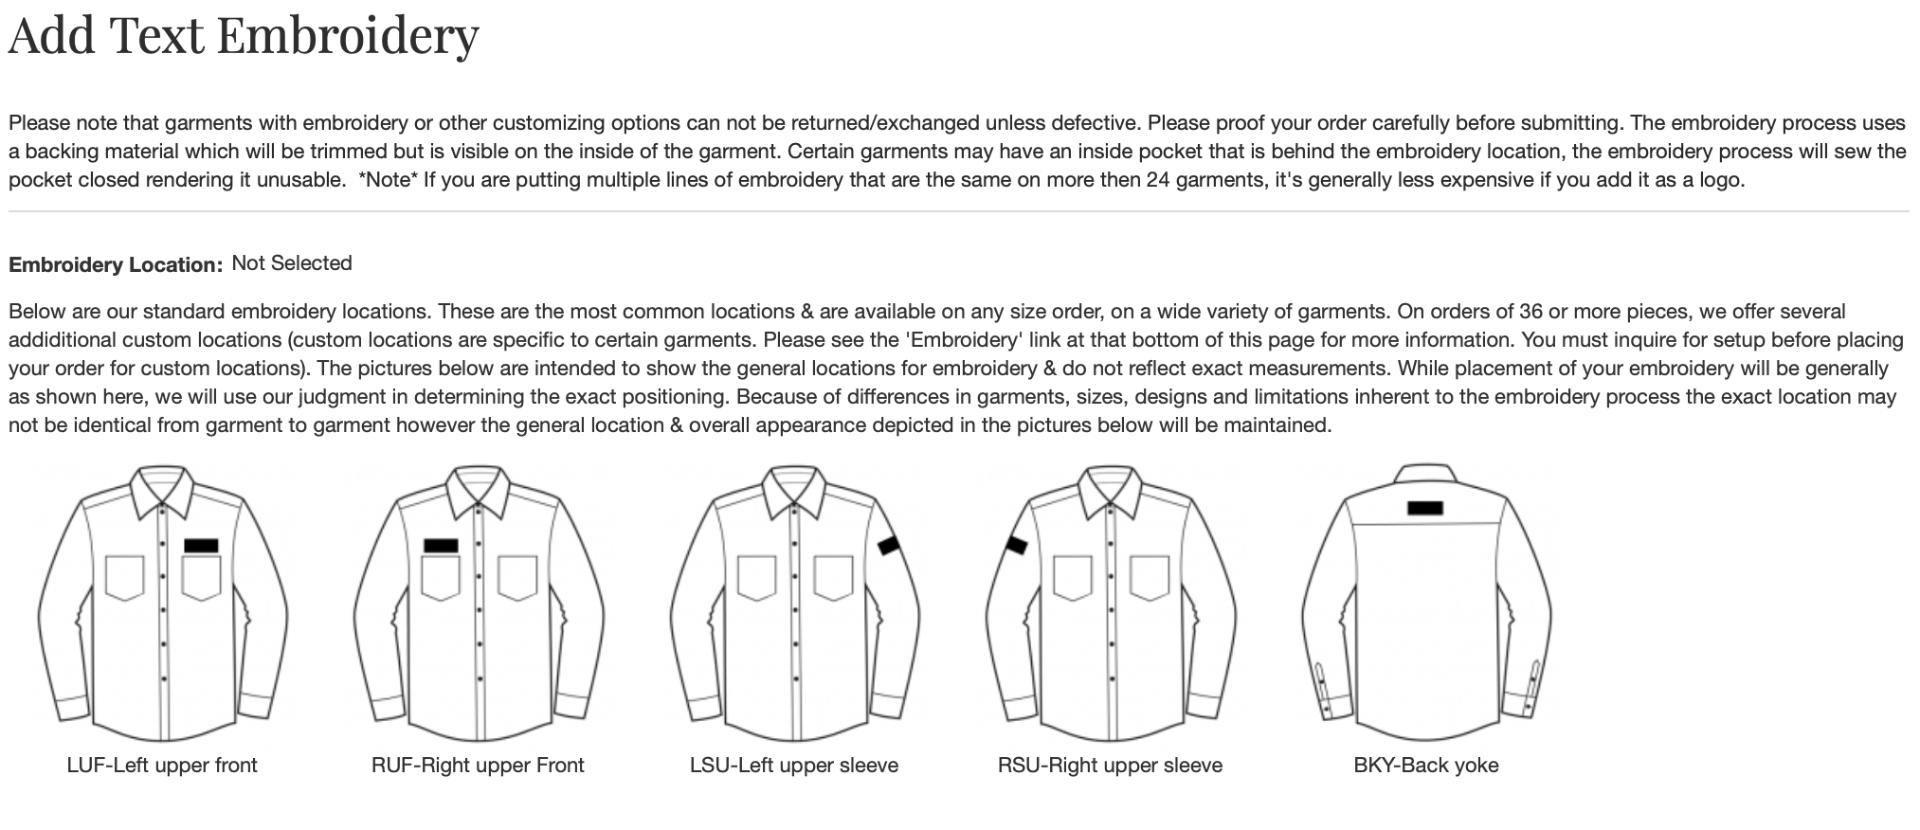
Step 3: Select the location where you would like to add text embroidery. Please note that you cannot put Text Embroidery in the same location where you have already added a logo.
Step 4: Select the font you would like to use.

Step 5: Select the font size.

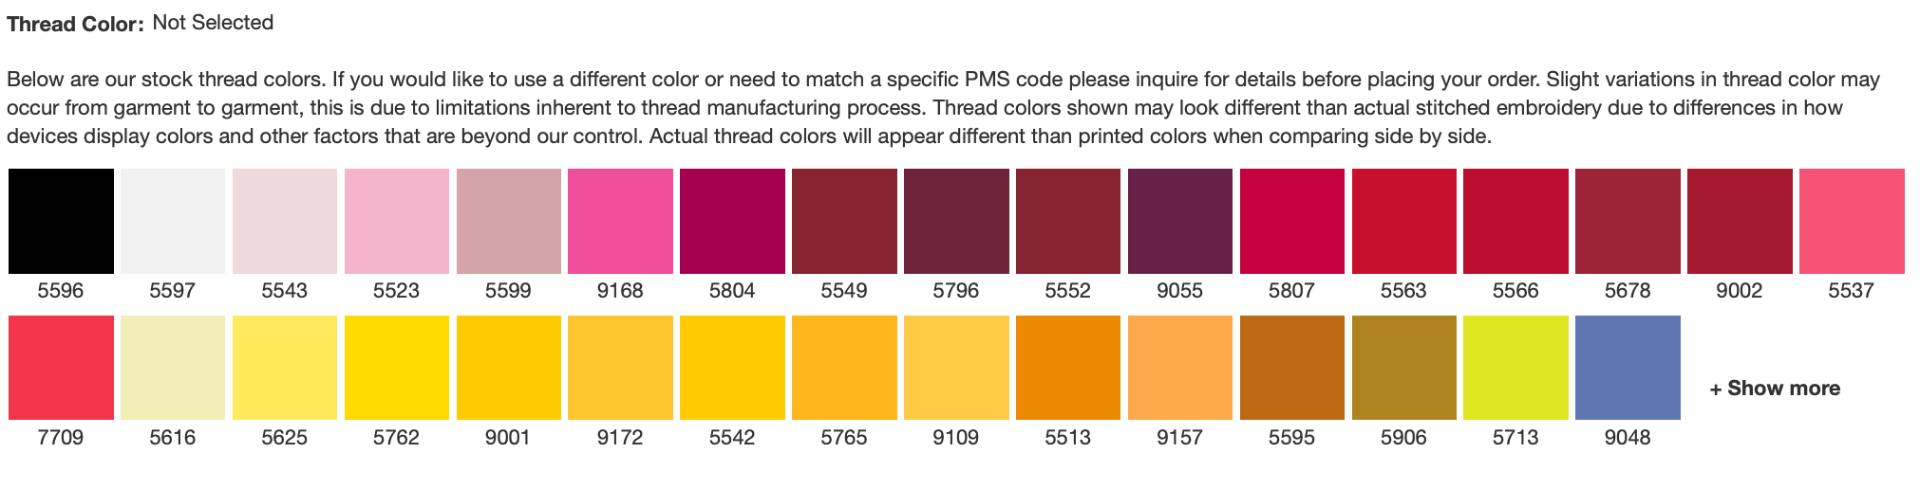
Step 6: Select the thread color.
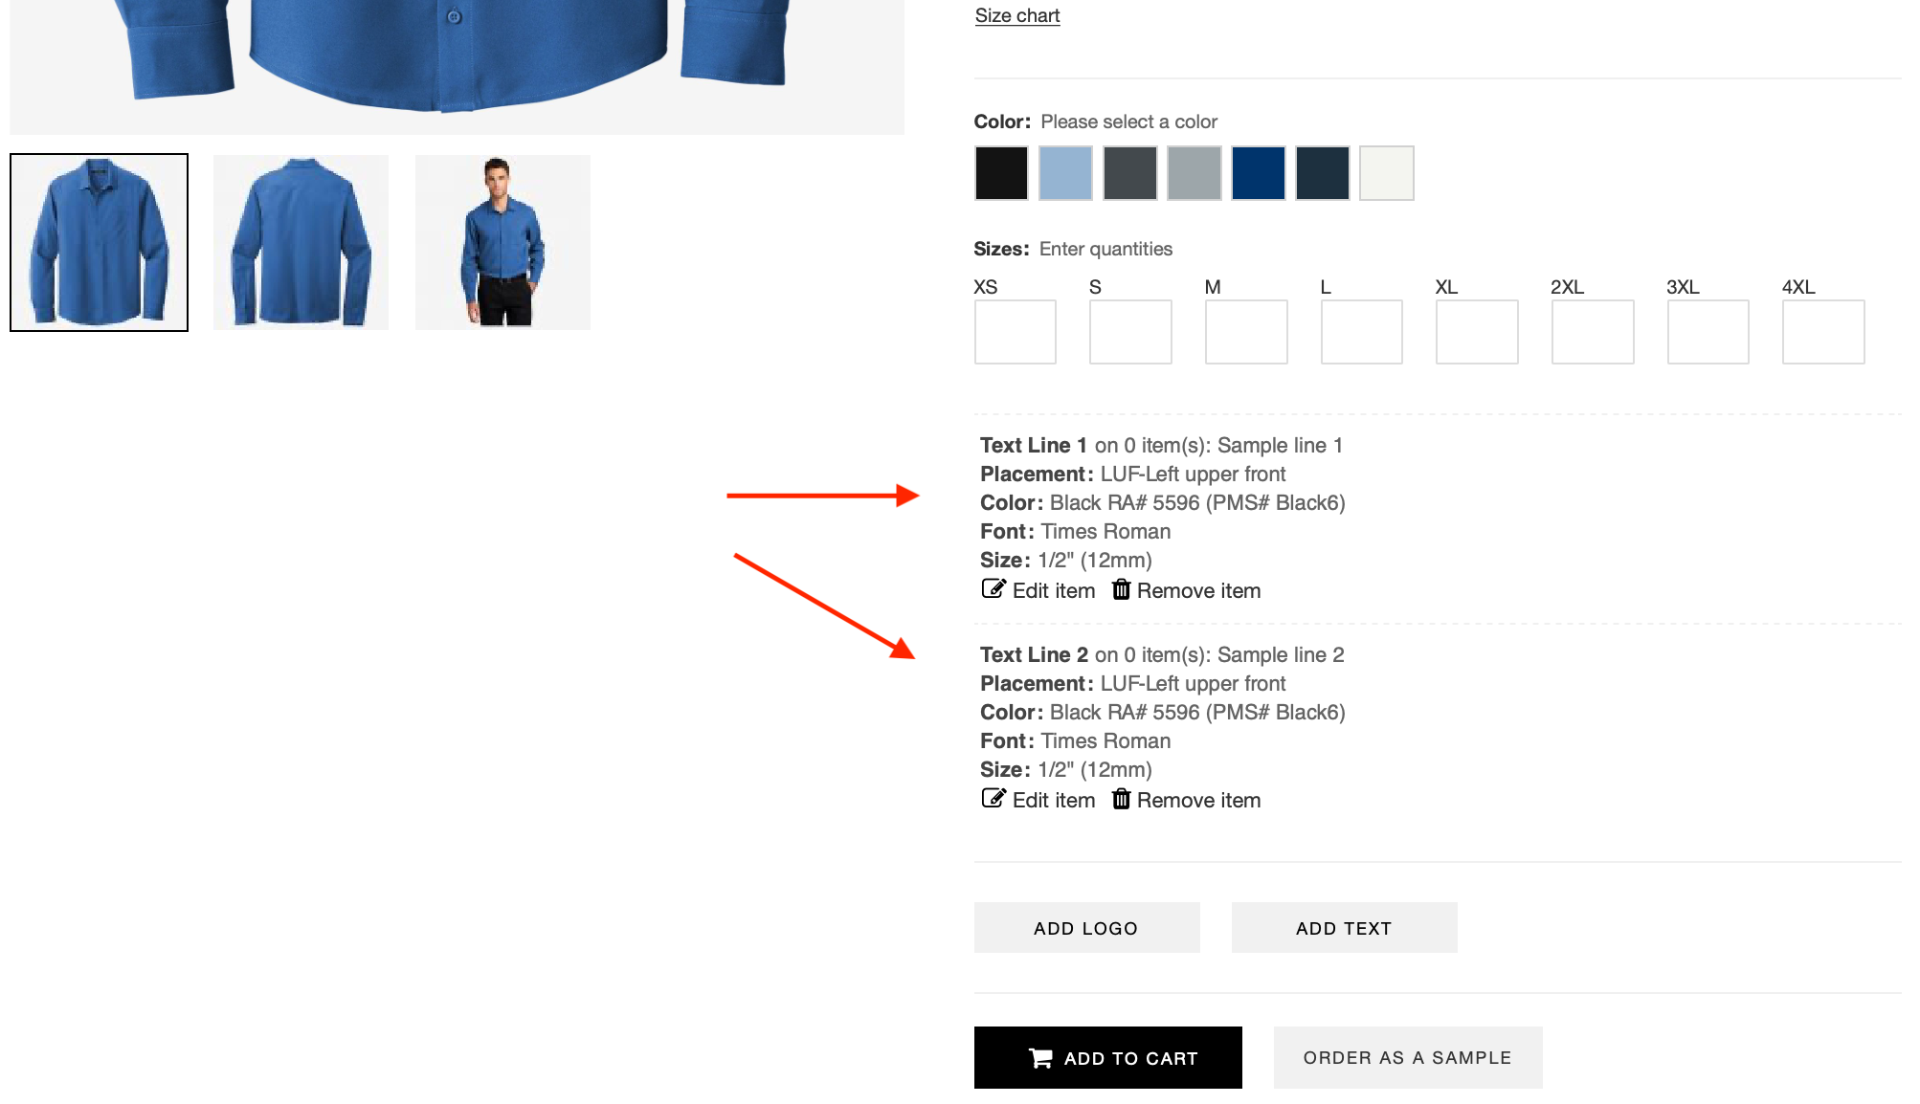
Step 7: Enter the text you would like embroidered for line 1. Be sure to enter exactly as you would like it to appear including capitalization & punctuation. Please note that we do NOT spell check so be sure your text is spelled correctly. Some locations allow for up to 3 lines of text, if you would like to enter a second and then third line click the +ADD ANOTHER LINE OF TEXT and complete the information. When finished click ADD EMBROIDERY TO ITEMS.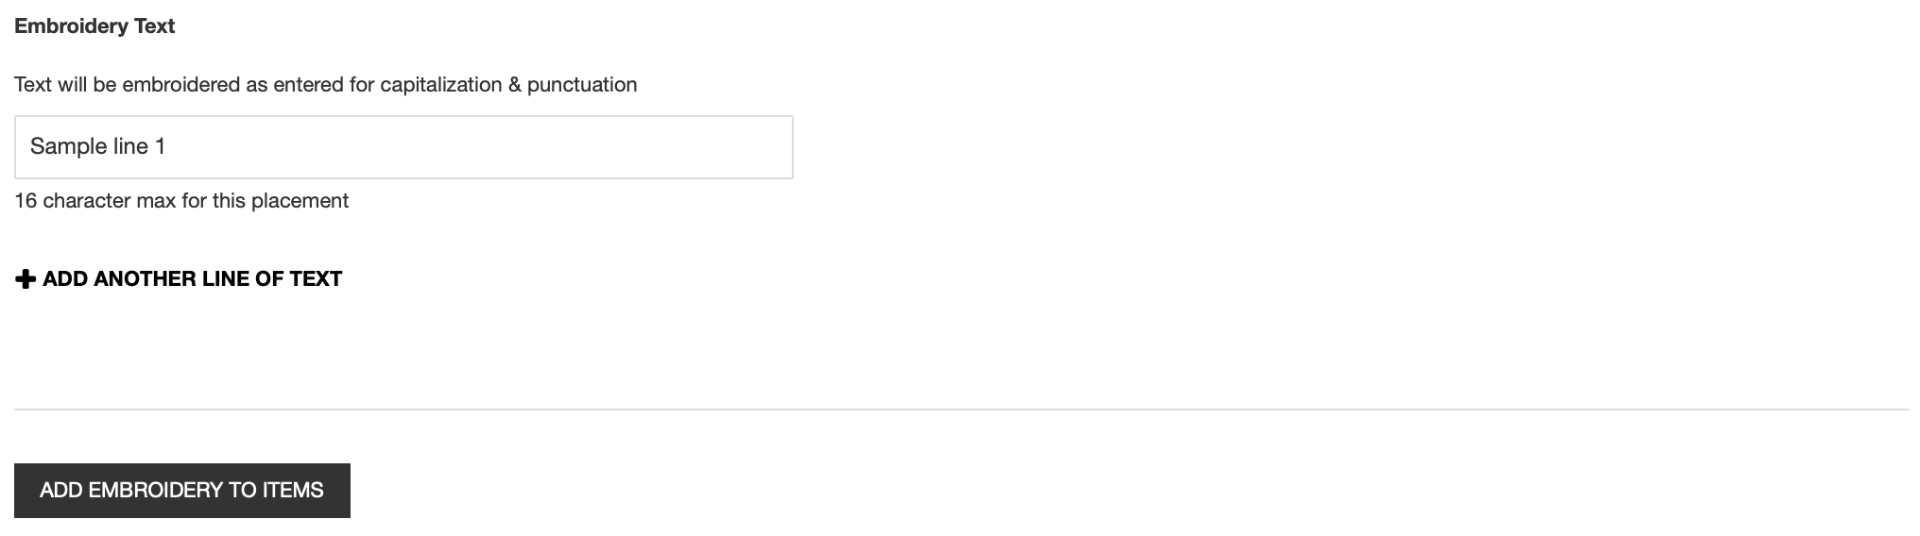
Step 8: If you would like to add text embroidery to a second or more locations on the same garment, just click ADD TEXT and repeat the process above. You can add embroidery to any/all available locations on a garment.
Step 9: If you already performed Step 1 you are ready to click ADD TO CART. If not, now is the time to select the product color and enter the quantities, then click ADD TO CART
After you have added the items to the cart the embroidery system will reset so any new color or product you add to the cart after that point will not have the embroidery attached. If you would like to add the logo to a different color or product, you would just restart this process for that product.
If you have any questions, please send us an email from our Contact Us page.